
Why Your PS4 Won’t Connect to Hotel WiFi
If you’ve ever tried to connect your PS4 to hotel WiFi and watched the connection test fail, you’re not alone. I’ve dealt with this exact problem at dozens of hotels and I can tell you it’s not your console’s fault. The reason hotels block your PS4 is actually simple once you know what’s happening.
Hotel WiFi uses something called a captive portal.
A captive portal is a browser-based login page that hotels use to control who accesses their network. Think of it like a gate that only opens after you agree to the hotel’s terms or enter your room number and password. Every major hotel chain uses this system, from Hilton Honors to Holiday Inn to Comfort Inn.

The problem is that your PS4 can’t handle captive portal authentication automatically. When the console tries connecting to a hotel network, it goes through its standard setup process without opening a web browser. Without that browser, there’s no way to reach the login page, so the hotel blocks your connection entirely.
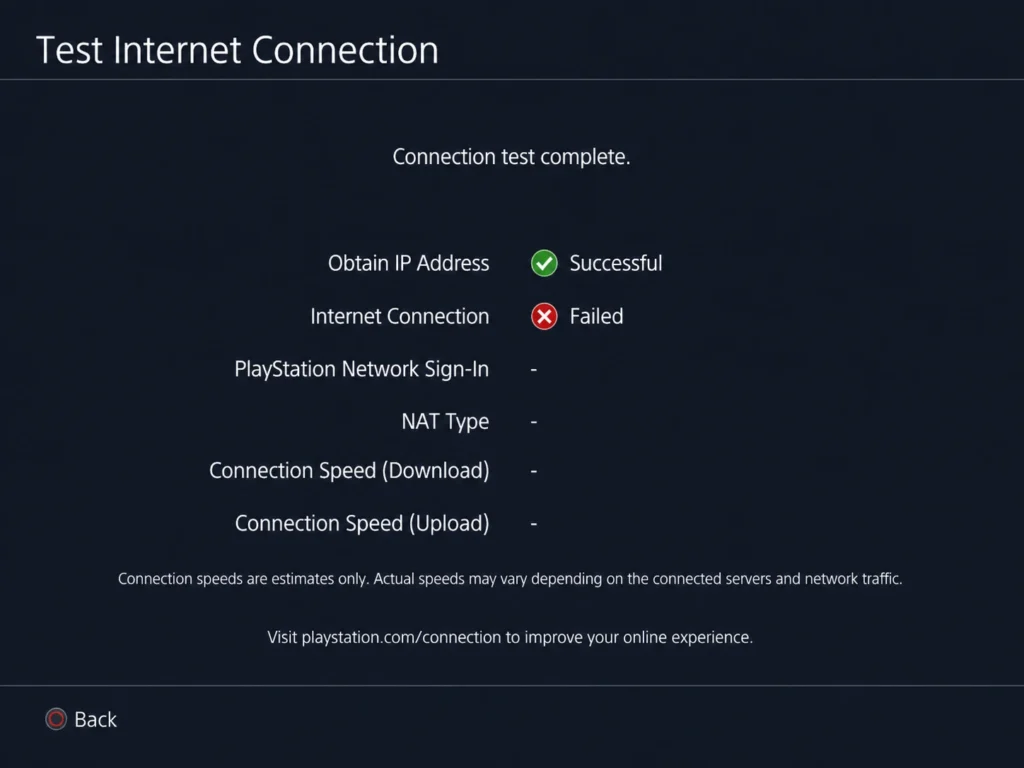
Here is what you will see on screen, and why it is completely normal.
When you run the PS4 connection test, here’s what you’ll see:
IP Address: Successful
Internet Connection: Failed
That “Failed” result tricks people into thinking something’s wrong with their console. Here’s the truth: nothing is broken. Your PS4 already joined the hotel WiFi signal and got an IP address, which means the hardware works perfectly. The network connection test fails only because you haven’t logged in through the hotel’s captive portal yet.
Once you trigger that browser login manually, which the methods below will show you how to do, your PS4 will connect to the PlayStation Network just like it does at home.
So before you restart your console or call the front desk, know this: the “Failed” screen is actually your starting point, not a sign that something has gone wrong.
What You Need Before You Start
Before you touch your PS4 network settings, grab these things first. I once spent 20 minutes troubleshooting a connection before realizing I never got the WiFi password from the front desk. Don’t make my mistake
Here is what you need before you start:
The hotel WiFi password or access code
Most hotels give you the WiFi password on a small card at check-in. If you do not have that card anymore, a quick call to the front desk will get you the code in under a minute. Some hotels do not require a password at all and just need you to accept their terms through a browser page.
Your PS4 controller and console powered on
Make sure your PS4 is fully powered on and not in rest mode. You need full access to the settings menu throughout this process.
The “Connect to the Internet” setting switched on
This one catches people off guard. Before you do anything else, go to Settings then Network on your PS4 and make sure the “Connect to the Internet” checkbox is actually checked. If that box is unchecked, none of the connection methods below will work, no matter how many times you try them.
An ethernet cable if your room has a port (optional)
Some hotel rooms have an ethernet port near the desk or behind the TV. If you spot one, grab your ethernet cable because a wired connection is more stable for gaming than hotel WiFi. I will cover the wired setup method later in this guide.
Once you have the hotel WiFi password ready and confirmed that internet access is enabled in your PS4 network settings, you are ready to move on to the actual connection methods.
Method 1: The Fastest Way (Triangle Button Shortcut)
Most PS4 hotel WiFi guides walk you through five different Settings menus before anything works. This method skips all of that. It’s the fastest approach I’ve found, and almost nobody knows about it.
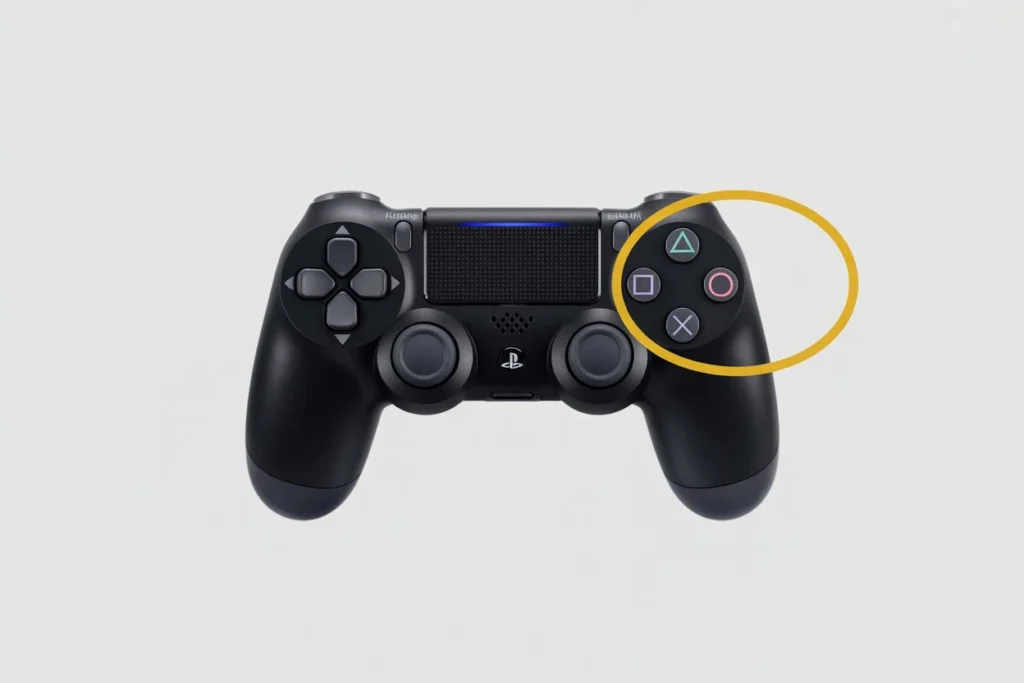
The Triangle button shortcut works directly from the connection test screen. Instead of backing out and hunting through menus for a browser, you trigger the hotel network login page from right where you failed the test. Once you know where to look, this takes 30 seconds.
The key thing to remember is that the “Connection Failed” result you see during the PS4 WiFi setup is not a dead end. It is actually your entry point into the authentication process. The failed screen gives you options at the bottom, and one of those options is the shortcut most people walk right past.
Step-by-Step: Triangle Button Method
Follow these steps in order and do not skip the PS4 connection test at the end:
- Go to Settings on your PS4 home screen
- Select Network then choose Set Up Internet Connection
- Select Use Wi-Fi and then choose Easy
- Find your hotel’s WiFi network name in the list and select it
- Enter the hotel WiFi password if prompted
- Let the PS4 run its automatic connection test
- When the test shows “Internet Connection: Failed” look at the bottom of the screen
- You will see a prompt to press the Triangle button for PlayStation.com Support
- Press Triangle and the PlayStation 4 browser will open automatically
- The browser will redirect you directly to your hotel’s login or authentication page
When you see “Internet Connection: Failed” during the PS4 connection test, don’t panic. This just means your PlayStation 4 joined the hotel network but hasn’t logged in through the captive portal yet. The Triangle button does that login step for you.
What to Do on the Hotel Login Page
Once the browser opens and loads your hotel’s login page, the process is straightforward. Most hotel WiFi login pages will show one of these options:
Accept terms only: Some hotels just ask you to click an “Accept” or “I Agree” button. One tap and your wireless connection on PS4 is fully authenticated.
Room number and last name: Many hotel chains ask you to enter your room number and the last name on the booking. This is the most common format at larger hotel brands.
Password entry: Some hotels provide a single WiFi password that you enter on the login page itself, separate from the network password you may have already entered.
After you finish the hotel’s login, close the browser and go back to Settings, then Network. Run the PS4 connection test again. Both Internet Connection and PlayStation Network Sign-In should now show Successful.
Method 2: How to Connect PS4 to Hotel WiFi Using the User’s Guide
If the Triangle button shortcut did not work for you, this is the next method to try. The User’s Guide method is probably the most widely known solution among PS4 owners who travel regularly, and for good reason. It works reliably across most hotel networks and requires no technical knowledge whatsoever.
The PS4 User’s Guide is a built-in feature that normally opens PlayStation’s support docs. But when you’re on a hotel network that hasn’t been authenticated yet, selecting User’s Guide makes your console try loading an external page. The hotel network catches that request and shows you the login page instead.
I have seen this method recommended across multiple sources, from real travelers sharing tips on Reddit to step-by-step video walkthroughs from people who have done this at Holiday Inn, Hampton Inn, and other major hotel chains. The PS4 browser login process through User’s Guide is consistent and beginner-friendly, which is why I recommend trying it second if Method 1 did not work.
Step-by-Step: User’s Guide Method
Follow these steps carefully and make sure your PS4 network settings already show the hotel WiFi as a saved connection before you begin:
- Go to Settings on your PS4 home screen
- Select Network then choose Set Up Internet Connection
- Select Use Wi-Fi and choose Easy
- Find your hotel’s WiFi name in the list and connect to it
- Let the PS4 run the connection test and note the “Failed” result
- Press the PlayStation button to return to the home screen
- Go back into Settings
- Scroll to the very top of the Settings menu and select User’s Guide / Helpful Info
- Select User’s Guide from the options that appear
- The PS4 browser will open and the hotel login page should load automatically
- Complete the hotel network login by accepting terms or entering your room details
- Return to Settings then Network and run the connection test again to confirm success
Your PS4’s wireless connection won’t work until you finish the browser login. Just connecting to the WiFi signal isn’t enough.
If the Login Page Doesn’t Appear
Sometimes the browser opens but shows a blank page or loads a generic PlayStation page instead of the hotel login screen. This is a common issue and there is a straightforward fix for it.
When the hotel WiFi login page is not showing on your PS4 browser, look for the search bar in the top right corner of the PS4 browser. Type your hotel’s name into that search bar, for example “Holiday Inn” or “Hilton” and press the search button. The browser will attempt to navigate to that search, and the hotel network will intercept the request and redirect the browser to the correct login portal.
I first came across this tip from someone who had this exact problem at a Holiday Inn and found that typing the hotel name in the search box immediately triggered the redirect. The hotel’s network essentially uses any outbound request as the trigger to show the login page, so giving the browser something to search for is all it takes to get the page to appear.
Once the login page loads, complete your authentication the same way described in Method 1 and then run the PS4 connection test again to verify everything is working.
Method 3: Using the PS4 Internet Browser App
This does the same thing as Method 2, just faster. Instead of digging through Settings, you open the PS4 internet browser as a standalone app. If you’ve used the browser before for YouTube or other sites, this will feel more natural.
The PS4 internet browser is a built-in application that comes pre-installed on every PlayStation 4. When you open the browser while connected to a hotel network that has not been authenticated yet, the hotel’s system automatically intercepts the browser’s attempt to load a page and redirects it to the hotel splash page instead. You did not do anything wrong and the browser did not malfunction. That redirect is exactly what you want to happen.
Multiple PS4 owners who have done this at real hotels, including at Comfort Inn and Suites locations, confirm that opening the internet browser app is often all it takes to pull up the hotel’s login screen without any extra navigation.
Step-by-Step: Browser App Method
Here is how to use the PS4 internet browser to complete the hotel network login:
- Press the PlayStation button to go to the PS4 home screen
- Navigate to the Library icon in the top menu
- Select Applications from the Library menu
- Scroll through your apps and find the Internet Browser
- Open the Internet Browser app
- If the browser asks you any startup prompts select Yes to continue
- The browser will attempt to load a default page
- The hotel network will intercept that request and automatically redirect the browser to the hotel’s captive portal or splash page
- On the hotel login page click Accept or Connect or enter your room details as required
- Close the browser and go to Settings then Network
- Run the PS4 connection test to confirm the internet browser login worked
If the hotel splash page does not appear immediately after opening the browser, try typing any web address into the browser’s address bar and pressing go. Any outbound request will trigger the hotel network to show the login page. Even typing something simple like “playstation.com” into the address bar is enough to prompt the redirect.
Once your PS4 browser login is complete and the connection test confirms success, your PlayStation 4 is fully authenticated on the hotel network and ready to use.
Method 4: Check PlayStation Network Status (Another Browser Trigger)
If the first three methods failed to trigger the hotel login page, try this. It uses a built-in network diagnostic feature on your PS4 to force the browser open without finding the browser app.
The “View Status of PlayStation Network Services” option lives inside the Network menu on your PlayStation 4. When you select this option, your console attempts to reach an external PlayStation Network server to check the current service status. The hotel network intercepts that outbound request before it reaches the PlayStation servers and redirects your PS4 to the hotel’s authentication page instead.
This method works especially well on restrictive hotel networks. Some hotels block browser-based attempts but still allow status checks. Use this as your backup if the other browser methods won’t load the login screen.
Here is exactly how to use the PlayStation Network status check to authenticate on a hotel network:
- Go to Settings on your PS4 home screen
- Select Network from the Settings menu
- Look for the option labeled View Status of PlayStation Network Services and select it
- Your PS4 will attempt to contact the PSN servers
- The hotel network will intercept the request and automatically open the hotel login page
- Complete the hotel authentication by accepting terms or entering your room details
- Close the browser when finished
- Go back to Settings then Network and run a connection test to verify success
This triggers hotel network authentication just like the browser methods, just from a different menu path. Many people prefer this because it feels more direct than opening User’s Guide or digging through Library to find the browser.
Once you complete the login process and the connection test shows success, your PlayStation Network access on the hotel network will be fully active and ready for online gaming or downloading updates.
Method 5: Connect Using a Wired Ethernet Cable
If your hotel room has an ethernet port, use it. A wired connection is faster, more stable, and often skips the browser login completely. Many hotels auto-authenticate wired connections without any captive portal.
The problem is that most people do not even realize their hotel room has an ethernet port. Hotels do not advertise this feature and the ports are usually hidden behind furniture or tucked into wall panels where you would never notice them unless you were specifically looking.
I always check for an ethernet port the moment I arrive because when one is available, connecting my PS4 takes less than a minute with zero troubleshooting.
A wired connection using a PS4 LAN cable provides a more consistent gaming experience than hotel WiFi. Hotel wireless networks get crowded when multiple guests are streaming video or video chatting at the same time, which causes lag and dropped connections during online gameplay. An ethernet cable gives your PS4 a direct line to the hotel’s internet router, which means you are not competing with other guests for bandwidth.
Where to Find the Ethernet Port in Your Hotel Room
The hotel ethernet port is almost never sitting out in the open. You need to do a little searching to find it, but the locations are pretty consistent across most hotels.
Check behind the TV first. Many hotels run ethernet cables to the back of the television for their own smart TV systems, and there is usually an extra open port you can use. Look for a rectangular port about the size of a phone jack with a plastic clip on top.
Check the desk area next. Some hotels install ethernet ports in the wall near the desk or inside a small wall panel that flips open. Business-focused hotels are more likely to have desk-mounted ports since they expect business travelers to need wired internet for laptops.
Check near the nightstand. A few hotel chains put network ports in less obvious spots like behind the nightstand or near floor-level outlets.
If you cannot locate a port after checking those three spots, the room probably does not have one and you will need to use one of the wireless methods instead.
PS4 Wired Connection Setup
Once you find the hotel ethernet port and have an ethernet cable on hand, the setup process on your PS4 is incredibly simple.
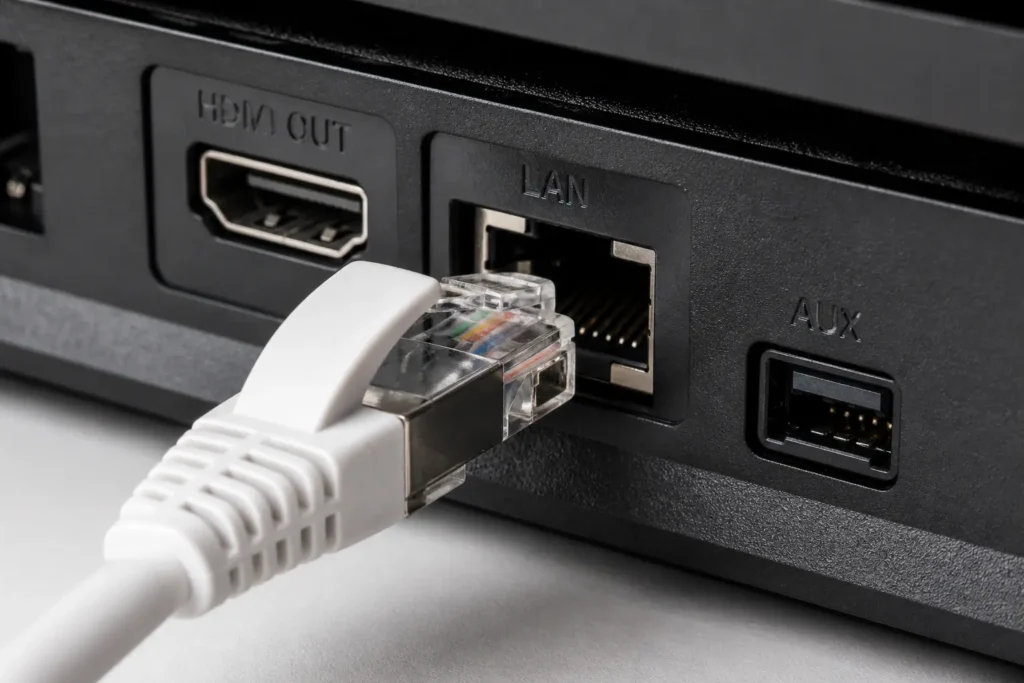
Plug one end of the ethernet cable into the hotel ethernet port and the other end into the back of your PS4 console. The ethernet port on the PS4 is located on the back panel next to the HDMI and power connections.
Now configure your PS4 network settings for a wired connection:
- Go to Settings on your PS4 home screen
- Select Network
- Choose Set Up Internet Connection
- Select Use a LAN Cable instead of Use Wi-Fi
- Select Easy for the setup type
- Your PS4 will automatically configure the wired connection
- Run the connection test when prompted
In most cases, the wired connection at a hotel authenticates automatically and you will see Internet Connection and PlayStation Network Sign-In both showing as Successful without ever opening a browser. If the test fails and you still need to authenticate, one of the browser methods from earlier in this guide should work. The difference is that with a wired connection, the hotel network almost always triggers the login page immediately without any extra steps.
Method 6: Connect Using Custom DNS Settings (Advanced)
This method is more technical than the browser approaches, but it can help when everything else fails. Changing to a custom DNS server on your PS4 sometimes bypasses hotel network restrictions. In rare cases, it works without opening a browser at all.
A DNS server is essentially the phone book of the internet. When your PS4 tries to reach a website or gaming server, the DNS server translates the website name into the actual numerical address your console needs to connect to.
Most hotel networks force your PS4 to use their own DNS servers, which is part of how they control and monitor network access. By manually setting your PS4 to use a public DNS server like Google DNS instead, you can sometimes work around the hotel’s network restrictions.
I want to be clear that this method does not work at every hotel. Some networks are configured in a way that forces all traffic through their captive portal no matter what DNS settings you use. However, when you are stuck and the browser login methods keep failing or looping, switching to a custom DNS server PS4 configuration is absolutely worth trying before you give up.
This is also how you connect PS4 to hotel WiFi without using a browser. On some networks, custom DNS lets the PS4 authenticate automatically with no login page.
Step-by-Step: Custom DNS Setup
The custom DNS setup process requires you to go through the Custom connection wizard instead of the Easy setup option you used in the earlier methods. The Custom wizard gives you control over individual network settings including DNS.
Follow these steps exactly and pay close attention to the DNS entries:
- Go to Settings on your PS4 home screen
- Select Network
- Choose Set Up Internet Connection
- Select Use Wi-Fi
- Choose Custom instead of Easy
- Select your hotel’s WiFi network from the list
- Enter the WiFi password if required
- IP Address Settings: select Automatic
- DHCP Host Name: select Do Not Specify
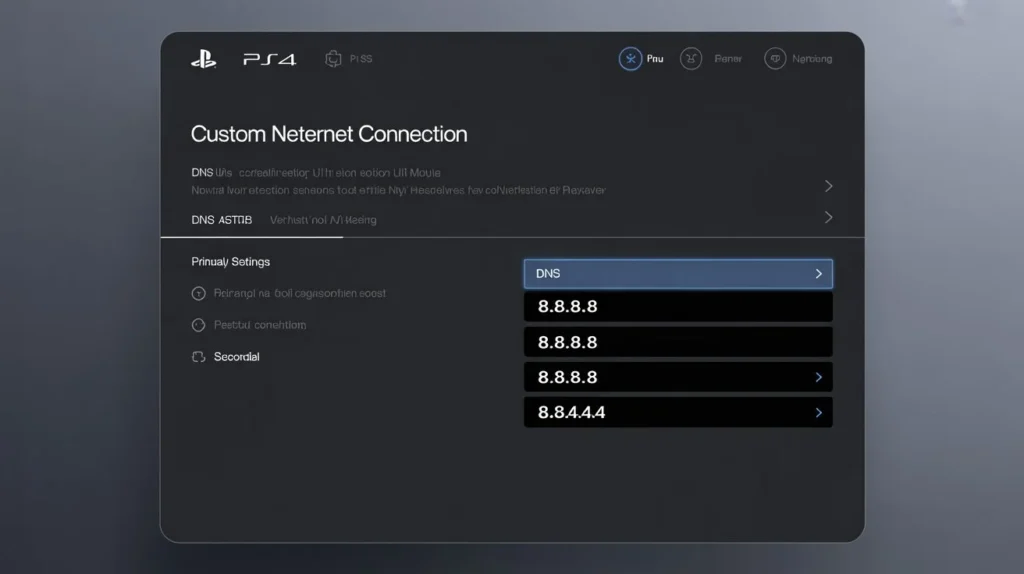
- DNS Settings: select Manual (this is the important part)
- Primary DNS: enter 8.8.8.8
- Secondary DNS: enter 8.8.4.4
- MTU Settings: select Automatic
- Proxy Server: select Do Not Use
- Run the connection test
The DNS 8.8.8.8 PS4 configuration uses Google’s public DNS servers, which are free, fast, and reliable. The primary DNS at 8.8.8.8 is the main server your PS4 will use, and the secondary DNS at 8.8.4.4 acts as a backup in case the primary server is unreachable.
After setup, run the test. You’ll get one of two results: immediate success with no browser needed, or the same “Failed” message requiring you to use one of the browser methods above. Either way, custom DNS usually makes the login page load faster than the hotel’s default DNS.
Alternative DNS Servers to Try
If Google DNS does not solve your connection issue, there are other public DNS servers you can try. Different DNS providers sometimes have better routing to certain hotel networks depending on the hotel’s internet service provider and geographic location.
If Google DNS doesn’t solve your connection issue, there are several other public DNS servers that work well with gaming consoles. For a comprehensive comparison of the best DNS servers for gaming performance, including speed tests and detailed setup instructions for each provider, check out this complete DNS guide for gamers Different DNS providers can significantly impact your connection speed and reliability, especially when gaming on hotel networks
Cloudflare DNS is another option known for speed and privacy. To use Cloudflare, enter 1.1.1.1 as your primary DNS and 1.0.0.1 as your secondary DNS.
You can test different DNS server combinations by going back into your PS4 network settings, selecting Set Up Internet Connection again, choosing Custom, and entering different DNS addresses. There is no risk in trying multiple DNS providers to see which one works best with your specific hotel network
Alternative: Use Your Phone as a Mobile Hotspot
When hotel WiFi won’t work no matter what you try, use your smartphone. The mobile hotspot feature lets you bypass hotel WiFi entirely by creating your own network using cellular data.
A mobile hotspot turns your phone into a miniature WiFi router that your PS4 can connect to just like any home network.
The setup takes about two minutes, requires no special software or subscriptions beyond your existing phone data plan and completely bypasses every captive portal issue that hotel networks create. Your PS4 sees your phone as a normal WiFi network with no login page blocking access.
I want to emphasize that this solution is completely free if you already have a phone with a data plan that includes hotspot capability.
Some guides recommend paid software like Connectify to share your laptop’s connection, but that is unnecessary when your phone already has this feature built in at no extra cost. Every iPhone since the iPhone 4 and nearly every Android phone from the past decade includes mobile hotspot as a standard feature.
The trade-off is that this method uses your cellular data instead of the hotel’s internet, so you need to be mindful of how much data you consume. I will cover that important detail at the end of this section.
iPhone Hotspot Setup for PS4
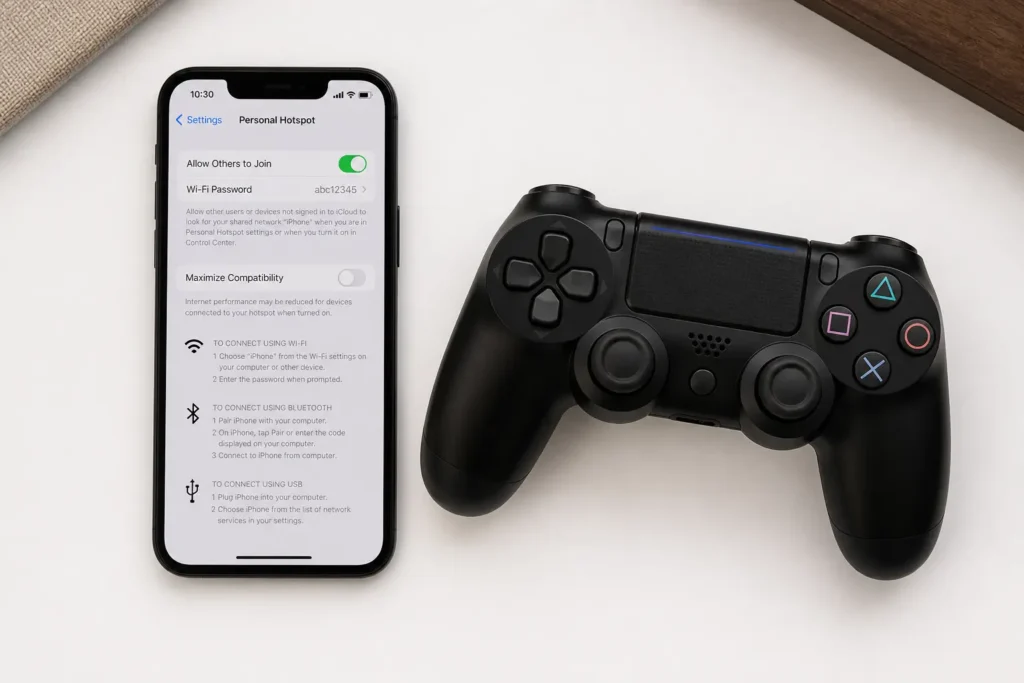
Setting up a mobile hotspot PS4 connection on an iPhone takes just a few taps in your phone’s settings.
Start by opening the Settings app on your iPhone. Tap on Cellular and then select Personal Hotspot from the menu. Toggle the switch next to Allow Others to Join to the on position. Your iPhone will display a WiFi password on this screen. Write down that password or leave this screen open so you can reference the password when you set up your PS4.
Now switch over to your PS4 and follow the standard WiFi setup process:
- Go to Settings on your PS4
- Select Network
- Choose Set Up Internet Connection
- Select Use Wi-Fi and then Easy
- Look for your iPhone’s name in the list of available networks
- Select your iPhone’s network name
- Enter the WiFi password shown on your iPhone’s Personal Hotspot screen
- Complete the setup and run the connection test
Your PS4 will connect to your iPhone exactly like it would connect to any other WiFi network. The connection test should show success immediately with no browser login required because your phone’s hotspot does not use captive portal authentication.
Android Hotspot Setup for PS4
Android phones have the same mobile hotspot capability with a slightly different menu path depending on your phone manufacturer.
On most Android devices, open Settings and then tap on Network & Internet. Look for the option labeled Hotspot & Tethering and tap on it. Select Wi-Fi Hotspot and toggle the switch to turn the hotspot on. Your phone will show you the network name and password. Some Android phones let you customize both the network name and password before you turn the hotspot on.
Once your Android hotspot is active, use the same PS4 setup process described in the iPhone section above. Go to Settings then Network on your PS4, choose Set Up Internet Connection select Use Wi-Fi choose Easy, find your phone’s hotspot name in the network list, and enter the password.
The PS4 connection process is identical regardless of whether you are using an iPhone or Android device as your mobile hotspot.
Data Usage Warning
Using a mobile hotspot instead of hotel WiFi burns through your cellular data. Online multiplayer gaming uses surprisingly little though: 40MB to 150MB per hour depending on the game. Even limited data plans can handle that.
The real danger is downloading games or updates. A single game update can easily consume 5GB to 20GB or more, which will blow through most phone data plans in minutes. Never download new games or large updates while connected through your phone’s hotspot unless you have a truly unlimited data plan.
Stick to online multiplayer gaming only when using your phone as a hotspot, and you should be able to play for several hours without hitting data limits on most modern phone plans.
Common Problems and How to Fix Them
Even when you follow the steps perfectly, you might run into issues that stop your PS4 from connecting to the hotel network. I have seen these same problems come up repeatedly across different hotels and different PS4 models, so you are definitely not alone if one of these situations sounds familiar. The good news is that most of these problems have straightforward fixes once you know what to look for.
Before you start troubleshooting specific issues, check one thing that catches a lot of people off guard. Go to Settings then Network on your PS4 and make sure the checkbox next to Connect to the Internet is actually checked.
If that box is unchecked, your PS4 will not even attempt to use the internet connection no matter how many times you run through the setup process. I mention this first because it is an easy thing to overlook and it will save you from troubleshooting everything else unnecessarily.
“My Password Keeps Failing”
If the hotel WiFi password keeps getting rejected even though you are absolutely certain you typed it correctly, the PS4’s auto-fill feature might be sabotaging you. The PS4 has a known quirk where saved passwords or auto fill can add an invisible trailing space at the end of the password field.
The hotel network sees that extra space as part of the password, so the authentication fails even though the actual characters are correct.
The fix is simple but requires a little patience. Delete the password completely and type it again manually, one character at a time, without using any saved credentials or auto-fill suggestions. Pay close attention as you type and make sure you do not accidentally hit the space bar after the last character.
If manual entry still does not work, double check the password with the hotel front desk. Some hotels use different WiFi passwords for different floors or room types, and occasionally the card they gave you at check-in has an outdated code printed on it.
“The Browser Opened But It’s Blank”
Sometimes the PS4 browser opens like it is supposed to but shows a completely blank white page instead of the hotel login screen. This does not mean the method failed. The hotel network just needs a little extra prompt to redirect the browser to the authentication page.
Look for the search box in the top right corner of the PS4 browser. Type the name of your hotel into that search box, for example “Hilton” or “Marriott” or whatever chain you are staying at, and press the button to search. The browser will attempt to perform that search, and the hotel network will intercept the outbound request and immediately redirect the browser to the hotel WiFi login page.
If you do not see a search box or typing the hotel name does not work, try waiting about 30 seconds. Some hotel captive portals have a slight delay before the redirect happens, and the browser might just need a few extra seconds to load the login page automatically.
“Connection Test Still Fails After Login”
You completed the hotel login process in the browser, clicked Accept, and closed the browser, but when you run the PS4 connection test again the result still shows Failed. This usually means one of two things happened.
First possibility is that the hotel login page timed out before you finished entering your information. Some hotels set very short timeout windows on their authentication pages, especially during busy check-in hours when the network is under heavy load. Go back and trigger the browser again using one of the methods from earlier, and complete the login process more quickly this time.
Second possibility is that your PS4 simply needs a fresh start to recognize the authenticated connection. Close out of all menus, fully restart your PS4 by holding the power button until the console shuts down completely, then power it back on and run the network connection test again. A full restart often clears whatever cached network state was preventing the PS4 from recognizing the successful authentication.
If the PS4 connection test still fails after restarting, try the Custom DNS method from Method 6 or switch to the mobile hotspot alternative from Method 7.
“Hotel WiFi Is Too Slow for Gaming”
You successfully connected but the online gameplay is laggy, choppy, or keeps disconnecting. Unfortunately this is a common reality of gaming on hotel WiFi and there is no magic fix that will turn a slow hotel network into a fast one.
Hotel WiFi is almost always slower and less stable than your home internet connection. Hotels typically have dozens or even hundreds of guests sharing the same internet connection simultaneously, and the network infrastructure is optimized for web browsing and email, not real-time gaming. When multiple guests are streaming video or downloading large files at the same time, the available bandwidth for everyone else drops significantly.
Your best option for better performance is to use a wired ethernet connection if your room has an ethernet port, as explained in Method 5. Wired connections are much more stable than wireless even on crowded hotel networks. If wired is not an option try gaming during off peak hours like early morning or late at night when fewer guests are using the hotel internet access.
Some hotel chains offer a premium WiFi tier for an additional fee that provides faster speeds and higher bandwidth limits. Check with the front desk to see if your hotel offers this option. For serious online gaming during an extended hotel stay, the premium tier might be worth the cost.
Final Step: Sign Into PlayStation Network
Getting your PlayStation 4 internet connection working at the hotel is only half the battle. You still need to sign into the PSN PlayStation Network before you can actually play online games, access the PlayStation Store, or use any network features on your console. The internet connection and the PlayStation Network sign-in are two completely separate steps, and a lot of people assume the second step happens automatically once the first step is complete. It does not.
I have seen this confusion happen countless times. Someone gets their PS4 connected to the hotel network, the connection test shows success, and then they try to launch an online game only to find they still cannot access multiplayer because they never manually signed into their PlayStation Network account. Your PS4 can have a working internet connection while your PSN account remains signed out, which leaves you unable to use any online features.
The good news is that signing into PlayStation Network on hotel WiFi takes less than a minute once you know where the setting lives, and you only need to do it once per hotel stay.
How to Sign Into PSN
The PSN sign-in option is located in the Account Management section of your PS4 settings menu, not in the Network section where you just finished setting up the internet connection.
Here is the exact path to follow:
- Make sure you are logged into your user profile on the PS4
- Go to Settings from the home screen
- Scroll down and select Account Management
- Choose Sign In to PlayStation Network from the menu
- You will see two sign-in options on the next screen
If you have the PlayStation App installed on your phone, you can use the QR code method for the fastest sign-in. Your PS4 will display a QR code on the screen and you scan that code with your phone’s PlayStation App. The app will automatically authenticate your PSN account without requiring you to type anything on the PS4.
If you do not have the PlayStation App or prefer manual entry, select the option to sign in with your email and password. Use your PS4 controller to enter your PlayStation Network email address and password on the on-screen keyboard.
Once you complete the sign-in process, your PS4 will confirm that you are now signed into the PlayStation Network hotel connection and all online features are now available.
Verify Everything Works
Passing the connection test is a good sign, but the real proof that everything is working comes from actually using the PlayStation Network features in a real application.
Open the PlayStation Store from your PS4 home screen. If the store loads normally and shows you the current featured games and sales, your PlayStation Network connection is working correctly. If the store shows an error or refuses to load, go back and check that you completed the PSN sign-in step above.
Another way to verify your connection is to launch any game that has online multiplayer and try to access the multiplayer menu. If the game can reach the online servers and shows your friends list or available matches, you are fully connected and ready for gaming on hotel WiFi. I have used this method with games like Uncharted 4 to confirm that the connection was not just passing a test screen but actually functioning in real-world use.
If either of these verification steps fails, sign out of PlayStation Network and sign back in again using the steps above. Sometimes the initial sign-in does not fully register and a second attempt solves the problem.
Advanced Method: MAC Address Registration (For Tech-Savvy Users)
This method is completely optional and most people will never need it. I am including it here for completeness and because it can be a lifesaver in very specific situations where every other method in this guide has failed. If you are not comfortable with technical networking concepts, skip this section entirely and stick with the methods above.
MAC address registration is a workaround for enterprise-level hotel networks that require you to register each device individually before granting internet access. Some high-end business hotels use this type of system where simply accepting terms on a browser page is not enough. The network administrator needs to manually approve specific devices by their unique hardware identifier, called a MAC address.
The technique involves using your laptop to authenticate on the hotel network while temporarily using your PS4’s MAC address instead of the laptop’s own MAC address. Once the hotel network registers and approves that MAC address through your laptop login, you switch back to your PS4 and the hotel network recognizes the PS4’s MAC address as already approved and authenticated.
This is a legitimate networking technique and not hacking or spoofing in any malicious sense. You are simply registering your own gaming console’s hardware address through a device that has a browser capable of completing the hotel’s registration process.
When to Use This Method
You should only attempt MAC address registration if you have already tried every other method in this guide and nothing has worked. This situation is rare but it does happen at certain hotels that cater primarily to business travelers and use stricter network security than typical leisure hotels.
This method is also useful if you are traveling with a PlayStation Portal or other gaming device that lacks a functional browser and the hotel network requires more than just a simple Accept button. Enterprise hotel networks at conference centers and business-class hotel chains are the most likely places where you will encounter this scenario.
If you are staying at a standard leisure hotel like Holiday Inn, Marriott, or Hilton, you will almost certainly not need this method. The browser-based methods from earlier in this guide work at the vast majority of hotels.
How to Spoof Your PS4’s MAC Address
Before you start, you need to find your PS4’s MAC address so you can copy it to your laptop. On your PS4, go to Settings then Network then View Connection Status. Look for the MAC Address line and write down the exact sequence of letters and numbers. The MAC address looks something like 00:11:22:33:44:55 with six pairs of characters separated by colons.
Now you need to change your laptop’s MAC address to match your PS4’s MAC address. The exact steps for this vary depending on whether you are using Windows, Mac, or Linux,
but the general process is to access your network adapter settings and manually enter a custom MAC address. Search online for “change MAC address” plus your specific operating system for detailed instructions.
Once your laptop is using your PS4’s MAC address, connect your laptop to the hotel WiFi and complete the full authentication and registration process through the laptop’s browser. Accept all terms, enter your room information, and complete any device registration forms the hotel requires.
After the hotel network confirms your laptop is authenticated and you have full internet access on the laptop, disconnect the laptop from the hotel WiFi and change the laptop’s MAC address back to its original value.
Now connect your PS4 to the hotel network using the standard WiFi setup. The hotel network will see your PS4’s MAC address, recognize that MAC address as already registered and authenticated from your laptop session, and grant the PS4 immediate access without requiring another browser login.
This PlayStation hotel workaround takes advantage of how MAC address-based authentication systems work on hotel networks. The network tracks which hardware addresses have been approved rather than tracking individual login sessions, so once your PS4’s MAC address is in the approved list, your console can connect freely.
Frequently Asked Questions
Why won’t my PS4 connect to hotel WiFi automatically?
Hotel WiFi uses captive portal authentication, which requires a browser login page to grant access. Your PS4 doesn’t automatically open a browser during the standard WiFi setup process, so the connection fails until you manually trigger the browser using one of the methods I covered earlier in this guide.
What does it mean when PS4 connection test shows “Failed”?
This is completely normal and expected. The “Internet Connection: Failed” result simply means you haven’t authenticated on the hotel’s login page yet so just click “Details” or press the Triangle button to continue with the authentication process.
Is there a faster way than going through all the Settings menus?
Yes, when the connection test fails, look at the bottom of the screen and press the Triangle button for PlayStation.com Support. This instantly opens the browser and redirects you to the hotel login page making it the fastest method available.
Why does my hotel WiFi password keep failing on PS4?
The PS4’s auto-fill feature sometimes adds an invisible trailing space at the end of saved passwords. Delete the password completely and type it again manually, one character at a time, without using any saved credentials or auto-fill.
Can I use my phone’s hotspot instead of hotel WiFi?
Absolutely, and I covered this in Method 7. Enable Personal Hotspot on your iPhone or Mobile Hotspot on Android, then connect your PS4 to your phone’s network just like any other WiFi connection, which uses your cellular data but completely bypasses the hotel authentication hassle.

