
Why You Should Delete Apps on Android (And How This Guide Helps)
I know how frustrating it is when your phone suddenly slows down or you see that dreaded “Storage Full” notification pop up at the worst possible time.
Trust me, I’ve been there more times than I’d like to admit. What I discovered after years of managing Android devices is that knowing how to delete apps on Android properly can solve way more problems than most people realize.
Most people uninstall apps just to clear space when that storage warning appears. That’s definitely one good reason. But removing unwanted apps does so much more than just free up storage.
When you remove apps you no longer use, your phone actually runs faster because apps consume your device’s memory and processing power even when you haven’t opened them in months. I noticed a real difference in my phone’s speed after I started regularly cleaning out unused apps.
Battery life improves dramatically too. Many apps drain your battery in the background constantly syncing data and running updates. I used to wonder why my battery died by mid-afternoon until I realized how many apps were running without my knowledge.
Then there’s the privacy angle. The fewer apps you have, the fewer apps can access your personal information. Good Android app management means being intentional about which apps stay on your device.
But here’s the critical thing most guides won’t mention: there’s a right way and a wrong way to delete apps. Most people just tap uninstall and assume they’re finished.
What they don’t realize is that leftover files and data often remain behind, wasting device storage and cluttering your phone’s file system. These “ghost folders” can actually slow down your system over time.
In this guide, I’m going to show you not just how to delete apps, but how to delete them completely.
You’ll learn multiple methods that work on any Android phone, how to handle stubborn apps that won’t uninstall and that crucial final step that protects your privacy even after the app is gone.
Whether your home screen is a mess, your storage is maxed out, or you just want your phone to feel fresh again, you’re in the right place.
To get a quick visual overview of the three main methods, watch this video demonstration:
This video walks through the fastest ways to uninstall apps on Android, which we’ll cover in detail below. After watching, keep reading for complete step-by-step instructions, troubleshooting tips and the complete deletion method most people don’t know about.”
Method 1: Delete Apps from Home Screen (Fastest Way)If
If you want to delete apps from home screen quickly without navigating through menus, this is the method I use most often. The long press to uninstall approach is the fastest way to remove unwanted apps on any Android phone.
You simply press and hold the app icon until options appear, then tap the uninstall or trash icon no complicated navigation required.
It takes literally five seconds once you know the trick, and I love this method because it’s so intuitive that even people who aren’t tech savvy can figure it out instantly. Let me walk you through exactly how it works
I love this method because it’s so intuitive. Even people who aren’t tech savvy can figure it out instantly. Let me walk you through exactly how it works.
Step-by-Step: Long-Press Method
Here’s how to uninstall apps using the long-press method:
Find the app you want to delete on your home screen or in your app drawer.
Press and hold your finger on the app icon for about two seconds. Don’t tap it, just hold it down until something happens.

A menu will pop up or the icon will start to wiggle slightly. You’ll see either a trash can icon, an “Uninstall” button, or an info icon with options.
Look for the option that says “Uninstall” or shows a trash can symbol. On most Android phones, you can either drag the app icon to this uninstall area at the top of your screen, or simply tap the uninstall option in the menu.
A confirmation message will ask if you’re sure you want to delete the app. Tap “OK” or “Uninstall” to confirm.
That’s it. The app disappears from your phone within seconds
One thing I noticed on newer Android versions like Android 13 and Android 14 is that the visual cues look slightly different depending on your phone’s manufacturer. Samsung phones show a small menu with clear options. Google Pixel phones display a trash can icon at the top of the screen. But the core action of pressing and holding the app icon works the same way across all Android devices.
The whole process takes less than ten seconds from start to finish. I can clean out five or six unused apps in under a minute using this method.
Works on Home Screen and App Drawer
Here’s something useful I learned: you can use this exact same method to delete apps from either your home screen or your app drawer android.
Your home screen is what you see when you unlock your phone. It shows your most used apps and widgets. The app drawer is that separate screen you access by swiping up from the bottom of your home screen, where all your installed apps live in one scrollable list.
Some people get confused about the difference between removing a home screen shortcut and actually uninstalling an app. When you long press to uninstall and choose the uninstall option, you’re completely removing the app from your phone, not just hiding the icon. The app is deleted from your device storage entirely.
I prefer using the app drawer when I’m doing a cleanup session because I can see all my apps in one place. It’s easier to spot apps I forgot I even had. But if I notice an app on my home screen that I no longer need, I delete it right there without switching screens.
The method works identically in both locations. Press, hold, and uninstall. Fast, simple, and effective every single time.
Method 2: How to Delete Apps Using Android Settings (Most Reliable)
When you need to know how to delete app on android phone with absolute certainty, the Settings method is your best bet. This is the method I trust most because it works on every single Android device, no matter which brand you own or which version of Android you’re running.
The Settings method takes you through your android phone settings into the apps management section where you get complete control over every installed application. You can see exactly how much storage each app uses, check when you last used the app, and uninstall it with a single tap.
I use this method whenever the long press approach doesn’t work or when I want to see detailed information about an app before deciding whether to delete it. Some apps take up way more space than you’d expect, and seeing those numbers helps me decide which apps to remove first when my storage is running low.
Step-by-Step: Settings Method
Here’s exactly how to access the android settings apps menu and remove any app:
- Open your android phone settings by tapping the gear icon. You’ll usually find this icon in your app drawer or notification panel.
- Scroll down through the settings menu until you see “Apps” or “Apps & notifications.” The exact name varies slightly depending on your phone, but it’s always somewhere near the middle of the settings list.
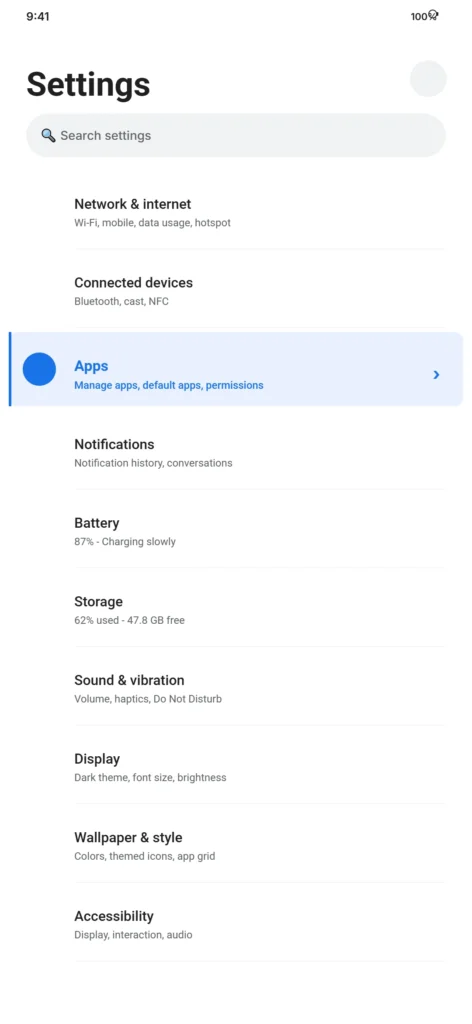
- Tap on “Apps” to open the complete list of installed applications on your device.
- You’ll now see every app installed on your phone. Some phones show recently opened apps first, while others list apps alphabetically. Scroll through this list until you find the specific app you want to uninstall.
- Tap on the app name to open its detailed information page. This screen shows you everything about the app including how much app storage space it’s using, its permissions, battery usage, and data consumption.
- Look for the “Uninstall” button. On most Android devices, you’ll find this button near the top of the screen, right next to options like “Force stop” and “Disable.”
- Tap the “Uninstall” button and confirm your choice when the popup appears asking if you’re sure.
The app is now completely removed from your device.
What I really appreciate about this method is that it shows me the storage breakdown before I delete anything. I can see if an app is using 50 MB or 500 MB, which helps me prioritize which third-party apps to remove when I need space quickly.
You can repeat these exact steps for as many apps as you want to delete. I sometimes go through my entire app list during a cleanup session and remove five or six apps I haven’t touched in months. The Settings method makes this process smooth and organized.
One helpful tip: if you’re trying to delete app on android phone but can’t find it in the main apps list, try using the search function at the top of the apps screen. Just type the app name and it appears instantly.
Why This Method Works on Every Android Phone
The Settings method is universal across all Android OS versions and manufacturers. Whether you own a Samsung, Google Pixel, OnePlus, Motorola, Xiaomi, or any other Android device, the Settings menu always has an apps management section.
Different manufacturers customize Android with their own interfaces. Samsung calls their interface One UI. Xiaomi uses MIUI. Google Pixel phones run stock Android. Despite these visual differences, every single one includes a way to manage apps through Settings.
Some phones label this section “Apps,” others call it “Application Manager,” and a few use “Apps & notifications.” The name might change but the function stays identical. You can always find your installed apps list somewhere in Settings.
I’ve used this method on at least a dozen different Android phones over the years, and it has never failed me once. When the home screen long press method doesn’t seem to be working, or when a specific phone has a slightly different interface that confuses me, I always fall back on Settings. The application manager is always there, ready to let me uninstall whatever I need to remove.
This consistency makes the Settings method the most reliable way to delete apps, especially if you’re helping someone else with their phone and you’re not familiar with their specific device model.
Method 3: Google Play Store Uninstall (Best for Bulk Deletion)
If you need to uninstall from Google Play Store and want to remove several apps at once, this method is an absolute game changer. The Google Play Store has a built-in app management feature that most people don’t even know exists, and it’s honestly one of the smartest ways to clean up your phone quickly.
What makes Google Play Store uninstall so useful is that you can see all your installed apps in one convenient list, check how much space each app is using, and select multiple apps to delete simultaneously. This feature saves me so much time when I’m doing a major phone cleanup.
I discovered this method when my phone storage hit maximum capacity and I needed to remove a bunch of apps fast. Instead of deleting apps one by one through Settings, I found that the Play Store lets me handle everything in a single screen. The difference in speed is incredible.
Step-by-Step: Play Store Method
Here’s how to uninstall from Google Play Store using the app management feature:
- Open the Google Play Store app on your Android phone. You’ll recognize it by the colorful triangle icon.
- Tap on your profile icon in the top right corner of the screen. Your profile icon shows either your Google account photo or your initials in a circle.
- A menu drops down. Select “Manage apps & device” from the list of options.
- You’ll land on a summary screen showing how much storage your apps are using. Tap on the “Manage” tab at the top of the screen to see your full app list.
- Now you see every app installed on your device, sorted by how recently you used them. Each app shows its size and when you last opened it.
- Find the app you want to uninstall and tap on it to select it. A checkmark appears next to the app name.
- After selecting the app or apps you want to remove, look at the top right corner of your screen. You’ll see a trash can icon appear.
- Tap the trash icon and then tap “Uninstall” when the confirmation message pops up.
The selected apps are now removed from your phone.
What I love about this method is how much information the Google Play Store gives you before you make a decision. You can sort apps by size to find the biggest storage hogs, or sort by last used to identify apps you haven’t touched in months. This makes it so much easier to decide which apps to keep and which ones to remove.
How to Delete Multiple Apps on Android at Once
Here’s the feature that makes this method truly special: you can delete multiple apps on android simultaneously instead of removing them one at a time.
When you’re on that “Manage” tab in the Play Store, you’re not limited to selecting just one app. You can tap the checkbox next to as many apps as you want. I’ve selected ten apps at once and deleted them all with a single tap of that trash icon.
This bulk deletion feature is perfect when you want to delete unused apps quickly. I use it whenever I notice my storage getting low. I sort my apps by last used, scroll through the list, and check off everything I haven’t opened in three or four months. Then one tap of the uninstall button clears them all out.
The time savings are significant. Deleting ten apps individually through the Settings method would take several minutes of navigating back and forth. With the Play Store bulk deletion, I can accomplish the same task in under 30 seconds.
One thing I’ve noticed is that this method is especially helpful when you’re preparing your phone for a long trip and want to make room for photos and videos. You can quickly identify and remove all those apps you downloaded once and forgot about, freeing up several gigabytes of storage in just moments.
The Google Play Store even shows you exactly how much space you’ll recover by deleting the selected apps, which helps you decide if you’ve removed enough or if you need to keep going.

How to Delete Preinstalled Apps on Android (Bloatware)
Learning how to delete preinstalled apps on android is one of the most frustrating challenges Android users face. I’ve dealt with this countless times, and I know exactly how annoying it is to find apps on your brand new phone that you never asked for and seemingly can’t remove.
Bloatware android refers to apps that come pre-installed on your phone by the manufacturer or your mobile carrier. These preloaded apps android take up storage space, sometimes run in the background consuming battery and data, and clutter your app drawer with things you’ll never use.
The truth is, you often can’t fully delete these factory installed apps the same way you remove apps you downloaded yourself. Android protects certain system application files from deletion to prevent users from accidentally breaking their phone’s core functionality. But don’t worry, there’s still a solution that gets you most of the way there.
What is Bloatware and Why Can’t You Delete It?
Bloatware android is the collection of apps that manufacturers and carriers add to your phone before you ever turn it on. These preloaded apps android include things like Samsung Pay on Samsung phones, carrier apps from Verizon or AT&T, game hubs, redundant browsers, and promotional apps for services you might never use.
Why can’t you just delete bloatware like any other app? The reason comes down to how these apps are installed. Factory installed apps are built into your phone’s system partition, which is a protected area of storage that regular users can’t modify. This protection exists for good reason. If someone accidentally deleted critical system files, their phone would stop working properly.
There are three types of apps you might struggle to uninstall:
System apps are essential for your phone to function. These include things like your Phone app, Contacts, Messages, and the Android operating system itself. You absolutely should not remove these, and Android usually won’t let you anyway.
Manufacturer bloatware consists of apps the phone maker adds to differentiate their phones from competitors. Samsung adds Bixby and Samsung Health. Xiaomi loads MIUI apps. These apps aren’t critical to your phone’s operation, but they’re still protected like system apps.
Carrier bloatware comes from your mobile service provider. If you bought your phone through Verizon, T-Mobile, or another carrier, you probably have several carrier-branded apps pre-installed. These apps remain even after a factory reset because they’re part of the system image the carrier provides.
When you try to uninstall a system application or bloatware, the Uninstall button appears grayed out or doesn’t show up at all. Android is protecting these apps from removal to maintain system stability.
When You Can’t Delete: How to Disable System Apps Android
If you can’t uninstall bloatware completely, you can disable system apps android instead. Disabling an app is the next best thing to deleting it, and for most practical purposes, the result is almost identical.
When you disable app android, the app stops running entirely. The disabled app no longer appears in your app drawer, can’t run in the background, won’t consume battery or data, and releases the RAM it was using. The only difference from true deletion is that the app files remain in your phone’s system storage, but they’re completely inactive.
Here’s how to disable system apps android:
- Open your phone’s Settings app.
- Tap on “Apps” or “Apps & notifications” to see your full app list.
- Find the bloatware app you want to disable. Scroll through the list or use the search function to locate it quickly.
- Tap on the app name to open its details page.
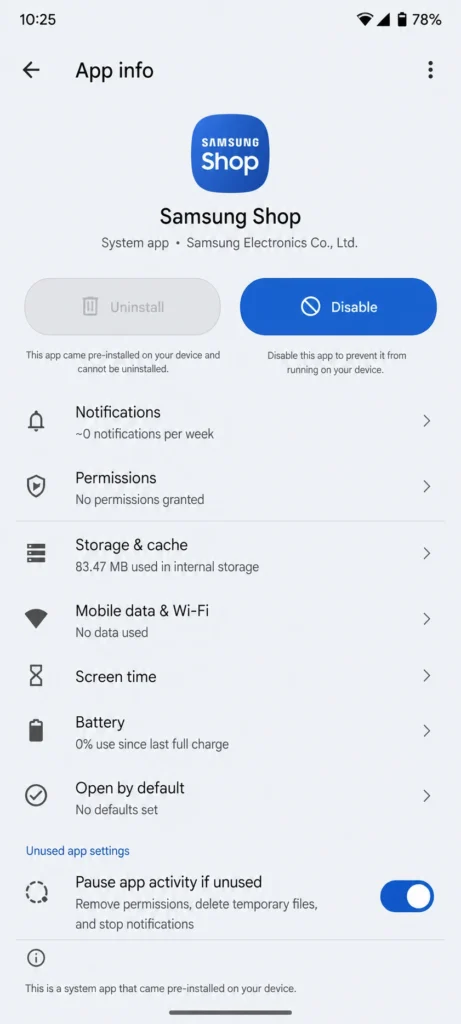
- Look for the “Disable” button. If the app can be disabled, you’ll see this option near the top of the screen where the Uninstall button would normally be.
- Tap “Disable” and confirm your choice when the warning message appears.
The app now disappears from your app drawer and stops all activity on your phone.
Android will show you a warning message explaining that disabling the app might cause other apps to misbehave. In my experience, this warning is overly cautious. I’ve disabled dozens of bloatware apps over the years and never encountered a single problem. The warning is there to protect Android from liability if you disable something important, but manufacturer bloatware is almost never important.
One great thing about disabling apps is that the change is completely reversible. If you disable an app and later decide you actually need it, you can go back into Settings, find the app in the disabled apps list, and tap “Enable” to bring the app back exactly as it was.
I use the disable feature on every new Android phone I get. Within the first hour of setting up a new device, I go through the entire app list and disable every piece of bloatware I can find. The difference in performance and battery life is noticeable, and my app drawer looks clean and organized instead of cluttered with apps I’ll never touch.
Which Pre-Installed Apps Are Safe to Disable?
This is the critical question, and getting it wrong could cause problems with your phone. Let me give you clear guidance based on what I’ve learned through years of managing Android devices.
Never disable these apps under any circumstances:
Phone, Contacts, Messages, Settings, Android System, System UI, Google Play Services, Google Play Store, or anything with “Framework” in the name. These are core system application components that your phone needs to function. Disabling any of these will cause serious problems.
Safe to disable without any concerns:
Manufacturer apps like Samsung Pay, Samsung Health, Bixby, Samsung Members, Game Center, Game Launcher, or any branded apps from your phone maker that duplicate functions you already have through Google apps. Carrier apps from Verizon, T-Mobile, AT&T, or any other provider are also safe to disable. These apps serve no essential function and are pure bloatware android.
Redundant apps are another safe category. If your phone came with both Chrome and Samsung Internet, you can safely disable whichever browser you don’t use. The same goes for duplicate gallery apps, music players, or email clients.
Proceed with caution on these:
Google apps like Google One, Google Pay, Google TV, or Google News can usually be disabled safely, but only if you’re certain you don’t use them. I keep Google Pay active because I use it for contactless payments, but I’ve disabled Google TV and Google One because I don’t need those services.
When I’m unsure about a preloaded apps android app, I use this simple test: I disable the app and use my phone normally for a day or two. If nothing breaks and I don’t miss the app, I leave the app disabled permanently. If something stops working or I realize I actually needed that app, I just re-enable it.
The worst that can happen if you disable the wrong app is that some feature stops working. You’ll notice immediately, and you can fix the problem in seconds by re-enabling the app. I’ve never permanently damaged a phone by disabling bloatware, and I’ve been doing this for years across many different Android devices.
Why Can’t I Delete This App? (Uninstall Button Greyed Out)
If you’ve ever tried to delete an app only to find the uninstall button greyed out android, you know how incredibly frustrating that experience feels. I’ve encountered this problem more times than I can count, and I’ve learned that there are exactly three reasons why Android blocks you from removing certain apps.
The good news is that each reason has a specific solution. Once you understand why the uninstall button is grayed out, you can take the right steps to either remove the app or disable it completely.
Android doesn’t randomly prevent you from deleting apps. The system has built-in protections that stop users from accidentally removing critical components or apps that have special security privileges. Let me break down each scenario and show you exactly how to handle it.
Reason 1: It’s a System App
The most common reason you see an uninstall button greyed out android is because you’re trying to delete a system application. These are apps that Android considers essential for your phone to work properly.
System application files include things like your Phone app, Contacts, Messages, Settings, the Android operating system itself, and core Google services like Google Play Services and Google Play Store. Android protects these apps from deletion because removing them would break fundamental phone functions.
When you try to uninstall a system app, you’ll notice the Uninstall button either appears grayed out and unclickable, or it doesn’t appear on the app’s information page at all. Android simply won’t let you proceed.
The solution for system apps is to use the Disable option instead of trying to uninstall. I covered this in detail in the previous section, but the key point is that disabling a system app achieves almost the same result as deleting the app. The app stops running, disappears from your app drawer, and stops consuming resources.
Not every system app can be disabled either. The most critical components like Phone, Contacts, and Settings typically don’t even show a Disable button. That’s Android protecting you from breaking your phone entirely.
Reason 2: It’s Pre-Installed Bloatware
The second reason for a grayed out uninstall button is that the app is bloatware android installed by your phone’s manufacturer or mobile carrier.
Preloaded apps android like Samsung Pay, carrier apps, game hubs, and manufacturer-branded services are built into your phone’s system partition the same way true system apps are. Even though these bloatware apps aren’t actually necessary for your phone to function, manufacturers protect them from deletion to ensure their branded experience stays intact.
When you try to delete bloatware android, the result looks identical to trying to delete a system app. The Uninstall button is grayed out or missing completely.
The solution is the same as with system apps: use the Disable option. I can disable almost every piece of bloatware on any Android phone I’ve tested. The app stops running, clears from my app drawer, and stops wasting battery and data.
Some bloatware can actually be uninstalled if you use advanced methods, but for most users, disabling bloatware gives you everything you need without any technical complications.
Reason 3: The App Has Administrator Privileges
This is the sneakiest reason for an uninstall button greyed out android situation, and most people don’t even know this issue exists. Certain apps request administrator privileges on your phone, and once you grant those privileges, Android blocks you from uninstalling the app until you revoke that access.
App permissions android include different levels of access, and device administrator permission is one of the highest levels. Apps that might request this permission include security apps, antivirus software, work profile apps, phone tracking apps, and parental control apps.
The problem is that once an app has administrator privileges, it can protect itself from deletion. This security feature exists to prevent malicious apps from being easily removed, but it also means legitimate apps with admin access become difficult to uninstall.
Here’s how to check if an app has administrator privileges and how to revoke that access:
- Open your phone’s Settings app.
- Navigate to Security or Biometrics and security. The exact name varies by phone manufacturer, but look for security-related settings.
- Scroll down and select “Other security settings” or “More security settings.”
- Tap on “Device admin apps” or “Device administrators.” This shows you every app that currently has administrator privileges on your phone.
- You’ll see a list of apps with toggles or checkmarks next to them. Find the app you want to uninstall in this list.
- Tap on the app name and then toggle the slider to off, or tap “Deactivate” to remove its administrator privileges.
- Confirm your choice when the warning message appears.
- Now go back to Settings, navigate to Apps, find the same app again, and check its information page.
The Uninstall button should now be active and clickable. Tap it to remove the app completely.
I’ve used this method to remove security apps I no longer needed and work apps after changing jobs. The key is knowing where to find that device admin apps list, which most users never discover on their own.
One warning: be careful about which apps you remove administrator access from. If the app is a legitimate security tool or work-related app, removing admin access might disable important features. Make sure you actually want to uninstall the app before you revoke its permissions.
In my experience, if you can’t immediately identify why you gave an app administrator access, you probably don’t need that app anymore and it’s safe to remove.
How to Recover Deleted Apps on Android
If you accidentally deleted an app or changed your mind after removing something, learning how to recover deleted apps on android is simpler than you might think. I’ve deleted apps by mistake more times than I’d like to admit, and I’m always relieved that getting them back takes less than a minute.
The secret is that Google never truly deletes apps from your account. Every app you’ve ever downloaded remains in your Google account app library forever, even after you uninstall it from your device. This permanent record makes reinstall deleted apps android incredibly easy whenever you need an app back.
I love this feature because it removes any fear about deleting apps. If I’m unsure whether I’ll need an app again, I just delete it anyway knowing I can bring it back instantly if I was wrong.
How to Find Deleted Apps Android in Your Library
Your Google Play library reinstall feature keeps a complete history of every app you’ve ever installed on any Android device connected to your Google account. This list goes back years, showing apps you downloaded on phones you don’t even own anymore.
Here’s how to find deleted apps android in your Google Play Library:
- Open the Google Play Store app on your phone.
- Tap your profile icon in the top right corner of the screen.
- Select “Manage apps & device” from the menu that appears.
- Tap on the “Manage” tab at the top of the screen.
- Look for the “Installed” dropdown menu and tap on it.
- Select “Not installed” from the dropdown options.
You now see a complete list of every app you’ve ever downloaded but currently don’t have installed on this device. The Google account app library organizes apps alphabetically, making them easy to find.
I use this feature all the time when I’m trying to remember the name of an app I used months ago. Instead of searching the entire Play Store and hoping I recognize the app, I just check my Not Installed list where I know the app will be waiting.
The list shows more than just apps you deleted recently. You’ll see apps from old phones, apps you tried once and immediately removed, and apps that aren’t even available in the Play Store anymore. Your Google account keeps this complete history automatically without you doing anything.
One helpful detail: the list shows when you last had each app installed, which helps you identify apps if you’re not sure from the name alone. If you see an app was last installed two years ago, you probably don’t need it anymore. If an app was installed last week, that’s likely the one you’re looking for.
How to Reinstall Deleted Apps Android
Once you’ve found the app you want in your library, reinstall deleted apps android takes just seconds.
Here’s the complete process:
- From the “Not installed” list in the Google Play Store, find the app you want to bring back.
- Tap on the app name to open its store page.
- Tap the “Install” button just like you’re downloading a brand new app.
- Wait for the download and installation to complete. This usually takes less than a minute depending on your internet connection and the app’s size.
The app is now back on your phone exactly as if you downloaded it fresh from the Google Play Store.
One important thing to understand: when you reinstall deleted apps android, you get the app back but not your data. If you deleted a game, you’ll start from the beginning again unless the game stored your progress in the cloud. If you deleted a note-taking app, your notes are gone unless you backed them up.
Some apps automatically sync data to your Google account or their own cloud service. When you reinstall these apps and sign in, your data comes back automatically. Apps like Gmail, Google Photos, Google Keep, and many popular apps work this way. But apps that store data only on your device lose that data when you uninstall them.
I learned this lesson the hard way when I deleted a puzzle game after finishing it, then reinstalled the game months later hoping to replay specific levels. All my progress was gone and I had to start completely over.
The good news is that the app itself returns to your phone in perfect working condition. You can start using the reinstalled app immediately, and it functions exactly like it did before you deleted it.
How to Delete Apps Android Tablet
If you’re wondering how to delete apps android tablet, I have great news for you. Every method I’ve shown you for deleting apps on Android phones works exactly the same way on Android tablets.
Tablets and phones both run Android OS, which means the underlying system for managing apps is identical across both device types. The screen is bigger on a tablet, but the steps you follow to remove apps remain completely unchanged.
I use both an Android phone and an Android tablet regularly, and I can confirm from personal experience that deleting apps works identically on both devices. The buttons are in the same places, the menus have the same names, and the process takes the same amount of time.
How to delete apps on android tablets using the long-press method:
Press and hold the app icon on your tablet’s home screen or app drawer until options appear, then tap Uninstall or drag the icon to the trash can that appears at the top of your screen. This method is just as fast on tablets as it is on phones.
How to delete apps on android tablets using the Settings method:
Open Settings, tap on Apps, select the app you want to remove, and tap the Uninstall button. The Settings menu looks nearly identical on tablets compared to phones, just with more spacing to accommodate the larger screen.
How to delete apps on android tablets using the Google Play Store method:
Open the Play Store, tap your profile icon, select Manage apps & device, go to the Manage tab, select the apps you want to delete, and tap the trash icon. The Play Store interface is actually easier to use on tablets because the bigger screen shows more apps at once.
The only real difference I’ve noticed when managing apps on tablets versus phones is that tablets sometimes have more pre-installed bloatware. Manufacturers love to load tablets with their branded apps, especially on cheaper tablets. But the methods for disabling or removing that bloatware are exactly the same as what I covered earlier in this guide.
Some people worry that tablets might have different steps or hidden menus for app management. That’s not the case. Android OS uses the same app management system across all Android devices, whether you’re using a small phone, a large phone, a compact tablet, or a huge tablet.
I’ve deleted apps from Samsung tablets, Amazon Fire tablets running modified Android, Lenovo tablets, and generic Android tablets. The process has been consistent every single time. If you can delete apps on your Android phone, you already know how to delete apps on any Android tablet.
The Right Way to Delete Apps (Avoid Leftover Files)
Here’s something most people don’t know: when you delete an app the normal way, you’re not actually removing everything. I discovered this years ago when I couldn’t figure out why my phone storage kept filling up even after I deleted dozens of apps.
The truth is that tapping the uninstall button removes the app itself, but it leaves behind databases, cache files, and folders full of temporary data that continue taking up space on your phone. These leftover files can waste gigabytes of device storage over time and actually slow down your phone’s performance.
I’m going to show you the complete method for deleting apps that ensures nothing gets left behind. This extra step takes only 20 seconds but makes a huge difference in how much storage you actually recover.
Why Standard Uninstall Isn’t Enough
When most people delete an app, they press and hold the icon, tap uninstall, and think they’re done. The app disappears from their home screen and app drawer, so it seems like the app is completely gone.
But what actually happens is different. The app’s program files get removed, but the app’s data files stay behind in your phone’s internal storage. These data files include things like downloaded images, cache files, user databases, temporary files, login credentials, and app settings.
I call these leftover folders “ghost folders” because they’re invisible in your regular app list but still occupy valuable app storage space in your file system. Over time, these ghost folders from dozens of deleted apps can accumulate and waste several gigabytes of storage.
The performance impact is real too. Every time your phone scans its storage or indexes files, it has to process these leftover folders. The more junk files you have scattered across your storage, the slower certain system operations become. According to Google’s Android documentation on app data management, cached files and temporary data can consume significant device resources, which is why clearing this data before uninstalling is the most effective way to completely remove apps from your device.”
I tested this on my own phone by checking my storage before and after doing a standard uninstall of a social media app I’d been using for months. The app itself was only 150 MB, but when I looked at the actual storage freed up, only 150 MB was recovered. The app’s data, which was over 800 MB of cached images and videos, stayed on my phone taking up space.
This is why people often delete apps to free up storage android but don’t see the storage increase they expected. The app is gone, but the data remains hidden in the file system.
Step-by-Step: Complete App Deletion
The right way to delete apps completely involves clearing all app data before you hit the uninstall button. This ensures you recover every single byte of storage the app was using.
Here’s the complete process I use every time I delete an app:
- Find the app you want to delete on your home screen or in your app drawer.
- Press and hold the app icon until options appear.
- Instead of tapping Uninstall, tap the information icon or “App info” option. This takes you to the app’s detailed settings page.
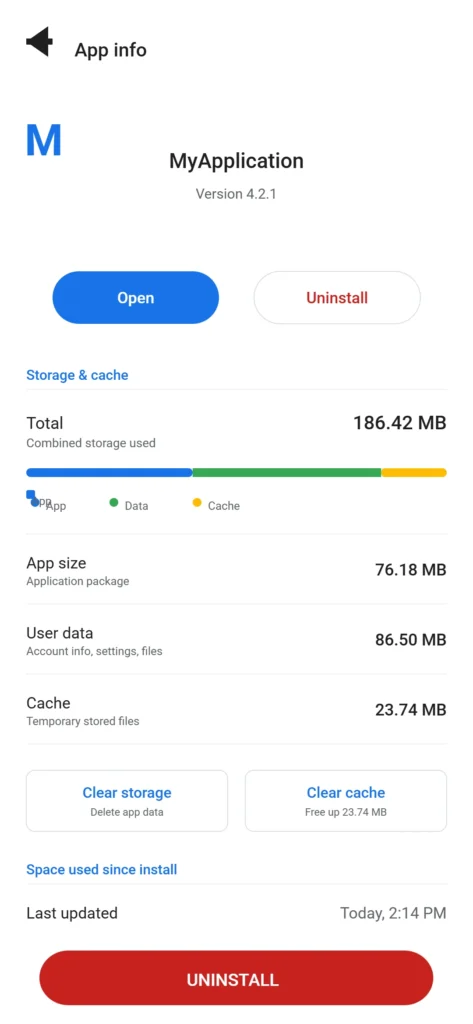
- On the app information screen, scroll down and tap on “Storage” or “Storage & cache.”
- You’ll now see exactly how much app storage space the app is using. This screen shows the app size, data size, and cache size separately.
- Tap on “Clear data” or “Clear storage.” A warning message will appear explaining that this action will permanently delete all files, settings, accounts, and databases associated with the app.
- Confirm by tapping “OK” or “Clear data” again.
- Wait a moment while Android removes all the app’s data. You’ll see the storage numbers drop down.
- Check that the total storage now shows 0 bytes or close to 0 bytes. This confirms all data has been cleared.
- Now tap the back button to return to the app information screen.
- Finally, tap the “Uninstall” button to remove the app itself.
The app and all its data are now completely removed from your phone.
This method ensures you free up storage android to the maximum extent possible. Instead of recovering just the app’s 150 MB program size, you recover the full amount including the 800 MB of data the app accumulated.
I use this complete deletion method whenever I’m removing an app I know I’ve used extensively. Social media apps, messaging apps, photo editing apps, and games tend to accumulate the most data over time. A game might be 200 MB to download but use 2 GB of storage after months of playing due to downloaded levels, saved games, and cached assets.
For apps I barely used or just installed yesterday, I sometimes skip the clear data step because those apps haven’t accumulated much data yet. But for any app I’ve used regularly for weeks or months, I always clear app cache android and clear all data before uninstalling.
The performance benefit is noticeable too. My phone feels snappier after doing a complete cleanup of several apps this way. The file system has less clutter to sort through, and the storage manager doesn’t have to account for orphaned folders that no longer belong to any installed app.
One bonus: clearing data before uninstalling also removes any app-specific settings or credentials stored locally. This is better for privacy since you’re ensuring the app leaves no trace on your device.
One More Step for Privacy: Revoking App Access After Uninstall
I discovered something that genuinely shocked me about how Android handles deleted apps, and I think it’s critical that you know about this before you finish removing apps from your phone. Even after you completely uninstall an app, that app can still maintain an active connection to your Google account and continue accessing your personal data.
Most people assume that uninstalling an app means the app is completely gone and can no longer touch anything on their device. But the reality is more complicated. Apps can request permissions to access your Google account, contacts, calendar, photos, and other sensitive information. When you uninstall the app, those permission connections sometimes stay active in the background.
I decided to check my own Google account settings one day and was surprised to discover that apps I’d deleted months ago still showed up in my connected apps list. These deleted apps theoretically still had access to my Google account information even though the apps themselves weren’t installed on my phone anymore.
This is the final step that completes the job of removing an app from your life entirely.
What Most People Don’t Know About Uninstalled Apps
Here’s the uncomfortable truth that almost nobody understands: uninstalling an app from your phone does not automatically revoke that app’s access to your Google account.
When you grant an app permission to access your email, contacts, calendar, Google Drive, or any other Google service, the app gets special access credentials tied to your account. If you simply uninstall the app without revoking those credentials, the connection remains active.
This means a deleted app could theoretically still sync data from your account or send information to its servers, even though the app doesn’t exist on your phone anymore. The app can’t actively run or display notifications, but the permission connection persists in the background.
I’ve checked my own Google account’s connected apps list many times and found apps I deleted years ago still listed there with full access permissions. Each one represents a potential privacy risk, even if the app is no longer installed.
The scary part is that most people have no idea this is happening. You delete an app thinking you’re done, but that app’s access to your personal information remains intact until you specifically revoke it.
How to Permanently Revoke App Access
This process takes only a few minutes but completely severs any remaining connection between you and the apps you’ve deleted.
Here’s exactly how to check your connected apps and revoke access:
- Open your phone’s Settings app.
- Scroll down and tap on “Google.” You’ll see options for your Google account and services.
- Tap on “Manage your Google Account” or “All Services,” depending on your phone’s version.
- Look for “Connected apps” or “Third-party apps & services.” This screen shows every app that has ever requested access to your Google account.
- Scroll through the list and you’ll likely see apps you deleted long ago. These apps are still listed as having access to your account.
- Tap on the app you want to remove from your connected apps list.
- Tap “Delete all connections,” “Remove access,” or “Disconnect,” depending on your phone’s wording.
- Confirm your choice when the warning message appears.
The app is now completely cut off from your Google account. Even if someone had access to the app, it could no longer sync data from your account or access your personal information.
I go through this list at least once every few months. It’s amazing how many apps accumulate in there over time. I’ve found dating apps I used briefly years ago, social media apps I deleted in frustration, and fitness apps I tried once and never opened again.
The Google account app library keeps a permanent record of every app that’s ever asked for access, and that record doesn’t clear automatically. You have to manually revoke each one.
What I appreciate about this final privacy step is that it puts you in complete control. Even if an app’s company is unethical or changes their privacy practices, you can immediately revoke their access to your account with just a few taps.
I especially do this for apps I never used consistently or apps from companies I’m unsure about. Better to be thorough with privacy than to discover later that an old app still had permissions it shouldn’t have.
By the time you finish this step, the app is truly gone from your digital life. The app files are deleted, the leftover data is cleared, and the permission connections are severed. That’s complete deletion done right.
Brand-Specific Tips (Samsung, Motorola, Xiaomi)
If you own a Samsung Galaxy phone, a Motorola Android device, or a Xiaomi phone, you might have noticed that your settings menus look slightly different from what you see in generic Android tutorials. The good news is that deleting apps works the same way on every Android phone, but the menus and button labels vary slightly depending on your manufacturer.
I’ve used phones from multiple brands, and I know how confusing it can be when you follow instructions for a generic Android phone but your screen looks different. Let me walk you through the specific steps for the most popular Android brands so you can delete apps with confidence on your device.
Samsung Galaxy App Removal (One UI)
Samsung Galaxy phones run a customized version of Android called One UI, which gives Samsung devices their distinctive look and feel. The core app deletion process is identical to standard Android, but Samsung’s interface has some visual differences you should know about.
To delete apps on a Samsung Galaxy phone, open the Settings app and look for “Apps” or “Applications.” On some Samsung devices, you’ll see it labeled as “Apps” with a folder icon, while others might call it “Application Manager.” The exact name varies depending on which Samsung model you have and which Android version you’re running.
Once you tap on Apps, you’ll see your complete list of installed applications. The layout might look slightly different from stock Android with more spacing and Samsung’s blue accent colors throughout the interface. Scroll through the list to find the app you want to remove.
Tap on the app name to open its information page. On Samsung Galaxy devices, the Uninstall button appears at the bottom of the screen. Tap it and confirm your choice.
One thing I’ve noticed with Samsung phones is that they sometimes show additional options you won’t see on other Android devices. For example, Samsung might offer “Disable” as an option for some apps, or show battery usage information. These extra features don’t change how deletion works, they just give you more information before you decide to remove an app.
Samsung’s One UI is actually quite intuitive once you know where to look. The steps are nearly identical to any other Android phone, just with Samsung’s branded design and a few extra features thrown in.
How to Delete Apps on Motorola Android
If you own a Motorola Android phone, you get a near-stock version of Android with minimal customization. This actually makes Motorola phones easier to navigate if you’ve read Android tutorials elsewhere, because what you see on your screen matches most generic Android guides.
One common question I see from Motorola users is about swiping apps up to delete them. Older Android versions had a feature where you could swipe up on an app in your recent apps list to remove it from that list. This caused confusion because swiping removed the app from the recents list but didn’t actually uninstall the app itself.
On Motorola Android devices, the standard deletion methods work perfectly. Open Settings, tap on Apps or Application Manager, select the app you want to remove, and tap Uninstall. It’s straightforward and follows the typical Android pattern.
Motorola devices typically don’t have heavy customization, so you won’t see as many extra features or alternative menu names. What you see is pretty close to pure Android, which makes it simpler to follow standard instructions.
The home screen long-press method works great on Motorola phones too. Press and hold any app icon, and you’ll see options to uninstall or app information. The experience is clean and direct without a lot of extra Samsung or Xiaomi flourishes.
Xiaomi MIUI App Deletion
Xiaomi phones run a heavily customized version of Android called MIUI, which is quite different from both Samsung One UI and standard Android. The app deletion process works the same way overall, but the menu names and visual design are distinctly Xiaomi.
On Xiaomi devices, you’ll open Settings and look for “Apps” or “App management.” Xiaomi sometimes calls this section “Manage apps” instead of just “Apps.” Once you tap on it, you’ll see all your installed applications listed in Xiaomi’s interface, which has its own color scheme and layout style.
Select the app you want to delete and tap on it to see the app’s information page. Look for the “Uninstall” button, which typically appears at the bottom or top of the screen depending on your MIUI version.
What I’ve noticed with Xiaomi MIUI is that it sometimes shows additional information about apps compared to other Android brands. You might see permission details, storage usage, and battery consumption all on one screen. This extra information can actually be helpful when deciding which apps to remove.
The visual differences between MIUI and other Android versions are noticeable, but the actual deletion process is fundamentally the same. You navigate to Apps, select your target app, and tap Uninstall. The terminology might change slightly and the design looks different, but the underlying system works identically across all Android devices running Android OS.
Don’t let the different menu designs intimidate you. Once you find the Apps section on your specific brand’s phone, the rest of the process follows the same logical flow as any other Android device.
Bonus Tips: Advanced App Management
Beyond the basic methods of deleting apps, there are a few additional techniques that can help you manage your Android device more effectively. These bonus tips cover situations where you might want to temporarily pause an app instead of deleting it, understand the difference between clearing different types of app data, and know when third-party tools might actually be useful.
I’ve picked up these tricks over years of managing Android phones, and they’ve saved me time and headaches more than once. Let me share what I’ve learned.
Force Stop vs Uninstall: What’s the Difference?
Sometimes you don’t want to permanently remove an app, but you need to stop it from running immediately. That’s where force stop app android comes in handy.
When you force stop app android, you’re telling the operating system to shut down that app and prevent it from running in the background. The app remains installed on your phone and takes up the same storage space, but it becomes completely inactive. The app won’t run processes, consume battery, or access your data until you manually open it again.
I use force stop when an app is misbehaving or draining my battery, but I’m not ready to delete it yet. Maybe I want to give the app another chance after restarting it, or I need to test whether the app is causing problems on my device. Force stopping lets me pause the app temporarily without the commitment of uninstalling it.
Uninstall, on the other hand, completely removes the app from your phone. Once you uninstall an app, it’s gone and can only come back if you download it again from the Play Store. Force stop is reversible, but uninstall is permanent.
The key difference is permanence. Force stop is temporary and doesn’t affect your storage space. Uninstall permanently removes the app and frees up the storage it was occupying.
You’ll find the Force Stop button on any app’s information page in Settings, right next to the Uninstall button. I’ve used this feature countless times to test whether a troublesome app was the source of a problem. If my phone runs better after force stopping an app, I know that app is the culprit and I can confidently uninstall it.
Clear Cache vs Clear Data: Which Should You Use?
This distinction confused me for years until I understood what each option actually does. When you open an app’s storage settings, you see two options: clear app cache android and Clear Data. These sound similar but they do very different things.
Clear app cache android removes temporary files that apps create to speed up performance. Cache files include things like downloaded images, webpage data, thumbnails, and temporary processing files. Clearing cache is completely safe and you should feel comfortable doing it whenever you want. Clearing cache doesn’t affect your login information, saved settings, or personal data stored in the app.
Clear Data, also called Wipe Data or Clear Storage, removes everything associated with the app including login credentials, saved preferences, in-game progress, app settings, and personal files. This is the nuclear option that essentially resets the app to factory condition.
I use clear app cache android regularly as a maintenance task. I’ll go through my apps once a month and clear cache from apps that accumulate a lot of temporary files like social media apps, web browsers, and streaming services. This frees up storage without affecting my actual data.
Clear Data is something I only use when I’m about to uninstall an app or when an app is broken and I want to start fresh. Never clear an app’s data unless you’re prepared to lose your progress, settings, or login information.
The practical difference matters. Clearing cache is like cleaning dust off your furniture. Clearing data is like throwing away the entire piece of furniture and starting over. One is a light maintenance task, the other is destructive.
When you’re doing the complete app deletion method I showed you in Section 9, you’ll use Clear Data to remove everything before uninstalling. But for routine phone maintenance, clear app cache android is what you want to focus on.
You’re Now an Expert at Deleting Android Apps
You’ve learned everything you need to know about how to delete apps on android properly. Whether you choose the quick long-press method from your home screen, the reliable Settings approach, or the bulk deletion feature in the Play Store, you now have multiple options that work on any Android phone.
More importantly, you understand that deleting apps the right way means more than just tapping an uninstall button. You know that clearing app data before uninstalling actually recovers the storage space you’re trying to free up. You understand why some apps won’t delete and how to handle those situations by disabling them instead. You’ve learned the critical final step of revoking app permissions from your Google account to protect your privacy completely.
I’ve covered the methods that work universally on every Android device, the bloatware challenges that come with manufacturer customization, and the privacy considerations most people never think about. You know how to uninstall apps android from your phone, tablet, or any other Android device regardless of the brand.
The bonus tips I shared will help you troubleshoot problems, understand the difference between temporary and permanent app removal, and manage your phone more effectively going forward. You can confidently handle preinstalled apps, recover apps you deleted by mistake, and maintain your phone’s performance by removing apps that are no longer serving you.
Most importantly, you now understand that remove apps from android isn’t just about freeing up storage or cleaning your home screen. It’s about taking control of your device, protecting your privacy, improving your phone’s performance, and extending your battery life.
The methods in this guide have worked for me countless times across different Android phones, and they’ll work for you too. Every step I’ve shared comes from real experience managing Android devices over many years, combined with proven techniques from Android experts.
Your next step is simple. Go through your phone today and identify the apps you no longer need. Use the method that feels most comfortable to you. Clear the data before uninstalling if you want maximum storage recovery. Revoke the app’s permissions from your Google account. You’re completely equipped to handle it.
Your phone will thank you with faster performance, longer battery life, and a cleaner, more organized experience. And now you know exactly how to delete apps on android the right way
Does deleting apps actually free up storage on Android?
Yes, but only completely if you clear app data first before uninstalling. Standard uninstall leaves behind cache files and databases. For maximum space savings, use Clear Data → verify 0 bytes → then Uninstall.
Can I reinstall an app after I delete it?
Yes, absolutely. All apps you’ve ever downloaded stay in your Google Play Library. Go to Play Store → Profile → Manage apps and device → Not installed tab → Install.
Why won’t some apps delete on my Android phone?
Three reasons: it’s a system app, it’s pre-installed bloatware, or it has administrator privileges. Disable system apps and bloatware instead. For apps with admin access, revoke privileges first at Settings → Biometrics and security → Device admin apps.
How do I know which pre-installed apps are safe to disable?
Never disable Phone, Contacts, Messages, Settings, Android System, or Google Play Services. Safe to disable: Samsung Pay, Bixby, Game Center, carrier apps, and redundant browsers. When unsure, search the app name with “safe to disable.
Will deleting apps improve my phone’s performance?
Yes, significantly. Deleting apps frees storage, reduces RAM usage, improves battery life, and removes “ghost folders” that slow your file system when you clear data first before uninstalling


